Good afternoon everyone. I promised you guys I would share how I made the tea light card that has been featured a lot lately but in the larger size of A5 card.
This is going to be a long post with mutiple pictures. (Apologies for the pictures being upside down it wasnt when I uploaded it but they are appearing on the screen that way not sure why)
I have managed to make this using 3 peices of A4 card stock rather than the specialist 14*14 card stock you would need otherwise.
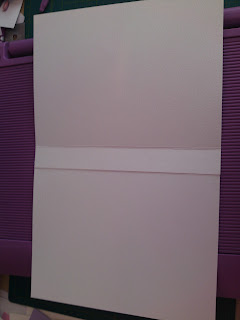
Firsty place you A4 card stock onto your boxer board (any other scoring board which has inches on it) butt it up using the shorter side and score at 6 inches and again at 7 inches
see picture below
You will need to do this on 2 peices of your card stock.
Cut your card stock at the 7inch score line so your left with this
Cut your card stock at the 7inch score line so your left with this
Do this on both peices
(do not discard these cut off's as you can use them later on)
Fold and burnish your score line and then stick the two folded flaps together to create your card
Now for your box to hold the tea lights.
You will need to cut your longest side at 10 2/8 inch, heigth stays the same (A4
You will need to cut your longest side at 10 2/8 inch, heigth stays the same (A4
Now score along the shortest edge (longest edge butted up against the edge) and score at
7/8 then 1 6/8 then then 6 6/8 then 7 5/8
turn your card 90 degrees and score at
7/8 then 1 6/8 flip it and do the same the other side
Fold and burnish all your lines it should look something like this
Then cut your ends so they look like this.
What I do next is ink all the edges
You will need to then attach all your backing papers so that its completley covered for when you start to assemble your box.
Use a nestie or anything you have to create an aperture on the front of your box then attach ascertate to create the window.
Use a nestie or anything you have to create an aperture on the front of your box then attach ascertate to create the window.
This is one I have completed
Once you ascertate is in place you can asemble your box, you will notice there is no back to it.
ou can either stick this straight down to your card base or use one of your off cuts from earlier and just slide that into the back of your box to create
a full box (remember it is your choice I do this becuase it gives the box a bit more stablity.
a full box (remember it is your choice I do this becuase it gives the box a bit more stablity.
You can decorate your card anyway you like I have made these for both xmas gifts and birthdays. I create a pocket on the inside of the card with a tag so that you can write on the tag but it is entirely up to you how you finish off your very own creation, have fun with it.
Here is a finished example
Here is a finished example
A trick I learnt after making a mistake with this is you will need to attach ribbon around your box so that it holds the flap at the top closed keeping your candles safely inside. Do this before you stick it down to the card base. It just means the receipent can access the box easily without having to rip it open and ruin the card in the process.
I hope this is helpful any questions please dont hesitate to ask. It seems lot more complicated than it really is and to actually do your cutting and scoring it only takes about 5 mins, its the decotating and the personal touches that takes all the time.
Hugs
Marie
xxxx


Thanks for the tutorial Marie, I am able to make these now for presents. They are fab.
ReplyDeleteGreat tutorial Marie - very clever! x
ReplyDeletevery clever
ReplyDeleteThank you so much for sharing, I wouldn't even know where to begin lol. Very clever x
ReplyDeletethanks honey this is fab and you have saved me a lot of frustration lol I could probably have worked it out eventually lol wasting lots of card/paper in the process now I dont have to so thanks again xxx
ReplyDeleteOh WOW Marie!! Can't wait to get started on this! - Thanks so much xxx
ReplyDeleteI have also adapted it to hold a minature bottle of baileys and small packet of ferrero rocher lol when its finished will upload pictures x am decorating it but cant do any today as having jobs done on house so no crafting for me at all today :(
ReplyDeleteThanks for a fab little tutorial I will deffo be giving it a go and what a beautiful card you've made :)
ReplyDeleteKerry x
Great tutorial! Thanks for sharing!
ReplyDeleteHugs
Dawn xx
Thank you for sharing the directions!! I'm going to try to make this for some Christmas gifts!!
ReplyDeleteZ
http://www.scrappinwithZ.blogspot.com
hey hun Ive added the card to my blog if you want to pop over to look http://hbkjbj.blogspot.com/ xxx
ReplyDeleteThis is a fab tutorial, I will be trying this
ReplyDeleteThanks so much for the inspiration and instructions - great ideas and beautifully crafted x
ReplyDeleteThese boxes are gorgeous! What a great idea. Thank you for sharing the tutorial :) Sarah x
ReplyDeleteThanks for the tutorial, these look fab, will be having a go later.
ReplyDelete